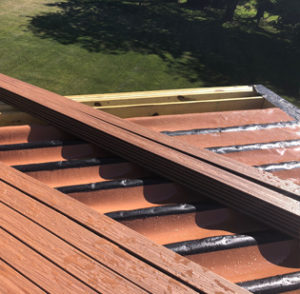
Builders, Do This, Not That When Installing Trex RainEscape Deck Drainage System
By Dave KileWhen installing or building any project, the clearer the directions, the better. If it’s your first time installing a drainage system as part of a deck build, you’ll want excellent instructions and superior support.
You’ll find both in Trex RainEscape. Whether you watch videos or download a handy one-page guide on installation online or call for support at 1-877-348-1385 or email [email protected], Trex RainEscape is there for you.
 There are also some quick dos and don’ts to keep in mind. The main idea is that you’re creating a waterproof system, so you’ll have to take precautions not to puncture the system in a way that would create a leak.
Do
- Make all joists straight and square.
- Add outlets to gutter every 12′ – 14′.
- Cover all joists and blocking with trough material, then tape.
- Cover the Trex RainEscape system with deck boards.
- Ensure the troughs and downspouts are dry and clear of debris before applying the tape.
Don’t
- Do not staple Trex RainEscape products anywhere other than into or over floor joists, ledger, rim joists, or headers.
- Do not use spiked hidden fasteners or any fastener without a flat base to provide pressure to butyl tape. Call a Trex RainEscape Specialist at 1-877-348-1385 for recommendations.
- Do not overdrive double thread screws.
- Do not stand anywhere other than the top of the floor joists, ledger, rim joists, or headers. The Trex RainEscape system cannot support body weight.
- Do not use nails to attach the deck boards above the Trex RainEscape system. For non-standard deck sizes or special features, please reference the installation guide or contact a Trex RainEscape Specialist.
With these guidelines in mind, you’re sure to create a deck your clients will love for years to come. Remember to let them know that with Trex RainEscape, they will enjoy a 25-year warranty on their deck drainage system.

