How to Install an Under-Deck Drainage System
By Dave KilePlanning a new deck allows you to be creative with your designs and dreams for deck boards, furnishings, and accessories. Then, you can’t wait to invite the whole gang over for your next family birthday or holiday.
Your new deck gives you more room to party, but what if you could double your outdoor living space?
Sound impossible? Not if you finish the space under your two-story deck! To create dry space under your deck, though, you need an under-deck drainage system. It is simple for any deck builder — DIY or pro. Watch this video or read on for step-by-step directions.
 Wait, What’s An Under-Deck Drainage System?
Just as you’d think, a deck drainage system pulls water away from your deck and away from your house. In addition, using a watertight gutter system makes it possible to waterproof under your deck.
You can add an under-deck ceiling system or deck roof with a deck drainage system and not worry about rain or ice dripping through your deck boards. The drainage system draws away water from your decking — Trex composite boards or wood deck boards —leaving you with many wonderful options:
- A play place for the kids
- An entertainment area for friends and neighbors
- A private spa and hot tub
- Storage space for sports equipment or seasonal decorations
- A screened-in porch for dining free of insects
What are the Options for Drainage Systems?
There are essentially two choices for drainage systems: over-joist or under-joist.
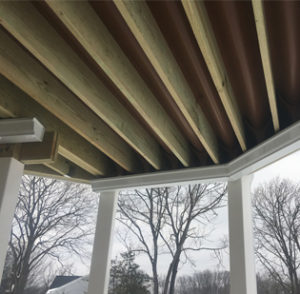 An over-joist system, installed over the joists, never lets water touch the wood deck framing. With an under-joist system, water trickles through the spaces between your deck boards, runs over the wood joists, and collects in the drainage system, causing damage in three ways:
- An over-joist system allows the wood to get wet repeatedly. As rain drips through the deck boards, over the joists, and into the drainage system below, it drenches the joists.
- This system traps moisture between the deck boards above and the ceiling below. With no air coming in to dry out the wood, the wood rots faster. Even an 8-year-old deck needs to be replaced when this happens.
- In the heat of summer, wet wood cooks and rots.
Thus, when planning a deck, settle for nothing less than an above the joists system. Not only does an above-joists system provide 100% protection of all the joists and beams from moisture penetration, but it also helps to hold the screws in place longer.
Which Drainage System Should I Buy?
Of course, you now know you should get an over-joist system. But which one to choose?
Check out this chart for comparison. Choose one that is high quality, guaranteed, and easy to install. Trex RainEscape covers all the bases! Check out the low cost of this by using the materials estimator.
 What tools are needed?
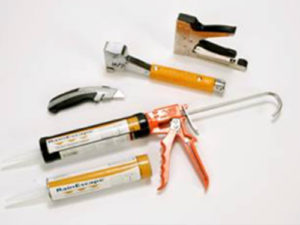
As you prepare for installation, make sure you have these tools on hand:
- Utility knife
- Staple gun and regular staples
- Caulk gun
A midspan nail on the joists’ underside is also helpful to keep them straight.
What Questions Should I Answer Before Installation?
The following information will help you determine the right way to install your new under-deck drainage system:
- Location of gutter line?
- Type of railing?
- Double or single picture frame or divider board?
- Double or triple beams?
What are the Steps for Installation?
The following are installation steps outlined in this video:
- Before installing trough material, acclimate it by unrolling and folding a soft crease down the center of the material or unrolling it flat on the ground. Acclimating the trough is especially important in areas with wide temperature fluctuation.
- Install downspouts for 12″ or 16″ joist spacing. Each bay has 1 downspout. Downspouts are the perfect height for 2×10″ joist.
- Cut downspout along the pre-scored marked guidelines. Make sure the cut side faces the deck bay.
- Staple downspout into place.
- Downspout funnels fit into a standard 5″ gutter below the deck. The funnel nozzle should extend at least 1″ into the gutter line and can be extended. You can also trim the funnel to fit a 2×6″ or 2×8″ joist.
- If using blocking, use blocking that is shorter than the joist height. Troughs hang down 4″ max.
- If installing 12″ on center, measure and cut 4″ on the side with a score mark.
- The smooth, shiny side of the trough should always face up.
- Slide the trough under the flashing on top of the ledger board.
- If possible, have a second person hold the trough, so it doesn’t slip.
- Trim the trough, making sure it’s about midway through the funnel.
- Work your way back to the starting point, stapling both sides in a zigzag pattern.
- Make sure all of the deck frame is covered.
- Pour water at the ledger board to ensure the water runs down and away from the house.
- Use flashing tape to seal the seams. Butyl not only covers overlapping seams to prevent wicking but also holds screws tight. Never put butyl tape directly on the wood.
- Troughs should be smooth, and water should run properly away from the house.
What are the Advantages of an Under-Deck Drainage System?
Once you have a drainage system in place, you can finish your under-deck space with a ceiling and lighting; this includes:
- Stringing up temporary lights.
- Installing a ceiling fan.
- Creating a beautiful permanent solution with Trex® RainEscape® Soffit Light.
Also, with a protected space, you might add appliances such as an outdoor television, sound system, or refrigerator. Your furnishings and accessories will be protected and last longer.
If you can dream it, you can live it. So, enjoy your under deck oasis — and have double the fun — with an under-deck drainage system.
