How to Waterproof the Deck You are Building
By Dave KileTo prolong the lifespan of your outdoor wood deck, you must install proper drainage. Over time exposure to harsh weather conditions, water and temperature can cause your outdoor living space to decay and lose its shine. Please read below to learn the best choice when it comes to keeping your deck sturdy and dry for years to come.
Decking Flanges
The spaces between the deck boards provide a convenient draining system for precipitation that prevents prolonged moisture exposure. They divert rainwater to the area below the deck.
But what if you want the space underneath to be dry? One waterproofing solution is to fill these gaps with rubber flanges. These prevent water from dripping below and can be designed to act as gutters that channel the water to the edges of the deck (contractors typically install these flanges by pounding them into the deck edges with a rubber mallet).
Some flanges may require trimming the deck boards to accommodate their shape. It is also possible that they may break down over time due to improper installation, rendering the waterproofing system ineffective.
Under-Deck Ceiling Systems
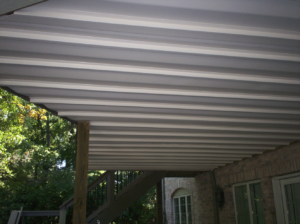 Another solution is the under-deck ceiling system. Similar to the flanges, these are installed underneath the deck boards and drain the water out, providing a two-in-one drainage system and a finished ceiling. They catch and drain the water away through the boards using corrugated plastic or aluminum panels.
However, because the draining occurs under the decking materials, this system allows water to drip through the boards and over the wooden joists. As a result, when these decking joists repeatedly get wet, they will eventually start to rot.
Below-joist drainage systems cause damage and wood rot in three ways:
- The continual exposure of the wood to the water as rainwater drips through the deck and into the drainage system below weakens the structure. The water hits the pan and runs out, but not before drenching the wooden joists.
- This type of system can also trap moisture. If the ceiling panels are installed under the deck, there is no air coming to dry out the wood. The only real ventilation is between the quarter-inch or less space between boards.
- The hot summer weather further cooks the trapped, waterlogged wood and accelerates the rotting process. Over time, this is the perfect formula for your deck’s wood to rot.
Watch this video to see what happens to wood with under-joist drainage systems.
Under-Deck Drainage Systems
Installing a deck drainage system during construction is the best way to waterproof under your entire deck. A deck drainage system diverts water away from the joists and beams. An over-the-joist deck drainage system such as Trex RainEscape provides 100% protection from the damage caused by wood repeatedly getting wet. It covers and protects all of the wooden substructure and can be installed with a composite or wooden deck.
Are you interested in DIY home improvement? Check out this handy chart to find an over-the-joist drainage system that’s right for you!
Under-Deck Drainage Installation
For DIY installation of your Trex RainEscape system, you will need:
- Utility knife
- Staple gun
- Caulk gun
It can also be helpful to have a midspan nailer on the underside of the joists to keep them straight.
Step 1: Install the Trex RainEscape Downspout
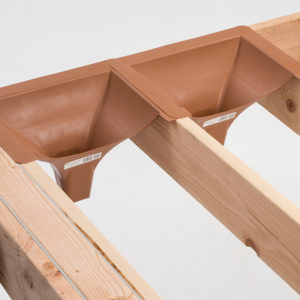
Install the downspout at the rim joist or ledger board.
Cut downspouts along with one 12″ or 16″ side on score mark, based on joist spacing. Install all downspouts along one rim joist and/or ledger board; cut outside toward the open deck bay. The downspout should extend 1″ into the gutter: cut or extend as necessary.
Step 2: Install the Trex RainEscape Trough
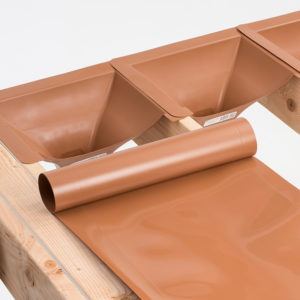
Unroll the trough using the 1.5″ score mark on the inside joist as a guide (on the left). Line up with the second joist.
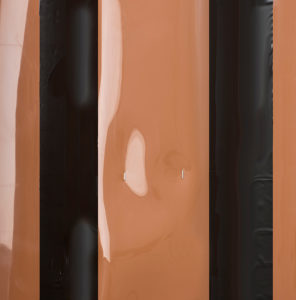
Installing the trough is the most involved step. When working with the Trex RainEscape trough material, ensure that the smooth/shiny side always faces up. Do not seam or overlap the troughs to extend its length.
Get complete instructions and watch a video to ensure a quality installation.
Step 3: Follow Step 2 For Remaining Joists
Step 4: Tape All Seams
Use the Trex RainEscape butyl tape to cover all the joists and seams.
Ensure the tape completely covers all seams and anywhere a screw penetrates the Trex RainEscape system.
To estimate the cost of your under-deck drainage system, check out this materials estimator. Call a trusted deck builder if you’re not up for a DIY project.
Trex RainEscape is not recommended for an existing deck unless you remove the deck boards.
Tips for Installation
Since you’re creating a waterproofing membrane system, you’ll have to take some necessary precautions to not puncture the system in a way that would create a leak.
DOS:
- Make all joists straight and square.
- Add outlets to the gutter every 12′ – 14′.
- Cover all joists and blocking with trough material, then tape.
- Finally, cover the Trex RainEscape system with deck boards.
- Ensure the troughs and downspouts are dry and clear of debris before applying tape.
DON’TS:
- Do not staple Trex RainEscape products anywhere other than into or over floor joists, ledger, rim joists, or headers.
- Do not use spiked hidden fasteners or any fastener without a flat base to provide pressure to butyl tape. Call a Trex RainEscape Specialist at 1-877-348-1385 for recommendations.
- Do not overdrive double-thread screws.
- Do not stand anywhere other than the top of the floor joists, ledger, rim joists, or headers. The Trex RainEscape system cannot support body weight.
- Do not use nails to attach the deck boards above the Trex RainEscape system. For non-standard deck sizes or special features, please reference the installation guide or contact a Trex RainEscape Specialist.
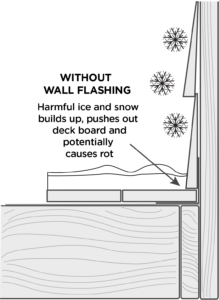
Add the Protection of Wall Flash
 You have the chance to add years of life to your deck during the construction stage. All you need to do is consider any wood exposed to the elements.
Easy-to-install, self-adhesive Trex RainEscape Wall Flash seals the space between your house and ledger board to keep water out. Best used during new deck construction, wall flash sealant is just a small investment with big returns.
Trex RainEscape® Wall Flash comes with a 25-year warranty from Trex, the world’s #1 composite decking brand. See how Trex RainEscape® Wall Flash protects in this video.
How Long Does Deck Waterproofing Last?
Using the membrane-based drainage system from Trex, you can prevent the joist substructure from mildew, rot, and wood decay that typically happens at around 8-10 years. With the average deck design warranted to last 25 years, it is worth the investment to ensure the deck substructure lasts as long as the decking it supports.
Ensure a waterproof deck, and create dry space — for deck storage, entertaining, or relaxing — with a Trex RainEscape® drainage system and wall flash.